The Ultimate Harbor Freight Tool Cart Modification!

In my mind when modifying anything the goal is for it to be easy to build, work effectively and easy to undo if your needs change. I can truly say that this modification fits that bill in every way. If you end up making a modification like this to your tool cart I would love to see pictures, so please send them to me shawneehillsfarm@gmail.com


The Ultimate Expandable Clamp Cart!

As a kid I grew up watching Norm Abram. I know, I was a weird child. In fact, I am pretty sure I have watched every episode. When I was a young adult and began accumulating an assortment of clamps I drew from my memory bank and did the best to recreate what I saw Norm build many years in the past. That clamp rack had served me well for almost 20 years, but I was outgrowing it. Since I had some sentimental attachment to it, I decided to figure out a way to make it work for me a little longer. What I came up with was adding drawers into the space between the two racks. Honestly, I believe the final product truly is the ULTIMATE Clamp Cart! I have never seen another solutions that organizes this many clamps into such a small footprint!

Building a Torsion Box Assembly table from Hollow Core Doors!

Watch me build the Assembly Table

Watch me build an organizer to go in the Assembly Table

images.jpg

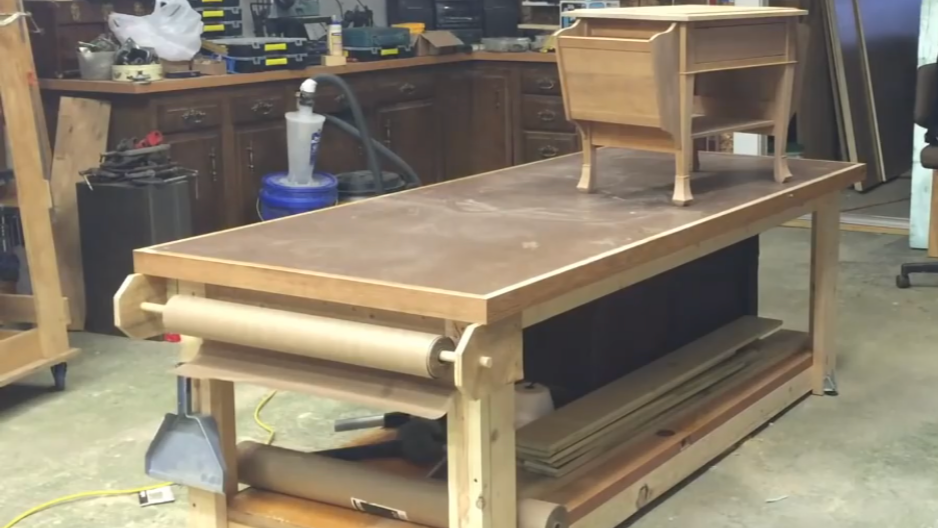
When building furniture, one of the most important things is to make sure you keep everything square. This is almost impossible unless you are building off of a surface that is perfectly in plane. That is why it is very important to have a table built specifically for assembly.

cut-hollow-core-door-800x800.jpg

A torsion box is a common way to build a surface that is not only flat from the beginning but that also resist twisting with changes in temperature and humidity. It is made from two skins with a grid of small squares, hexagons or octagons in between them. This grid is what helps to resist movement.

A torsion box takes a long time to make and the cost of material can add up, but there is a cheaper way. An everyday product that is built with a torsion box is a cheap flush hollow core door. These can be purchased at your local home center for around $30 for a 36” x 80” door. Doors are made with a torsion box because they too need to be able to resit warping. Luckily for me I had just remodeled my house and I saved all of the door slabs that I removed from the house. I used two of them in this project. One for the Top and one for a lower shelf. There is one major drawback to hollow core doors however and that is how thin the door skin is. This is fine for a door in most cases, however for a table that is going to have heavy objects on it and a lot of pounding with hammers and other tools it is not so good, so if you are going to use a door as your torsion box you need to be sure to add a suitable surface on the top side to take the abuse. I used 1/2” mdf with a layer of 1/4” hardboard to be a replaceable surface for mine

A Cabinet for My Parts Storage

61mIkOcCb7L._AC_SS350_.jpg

If you watched my first build video then you know from the beginning I wanted to build storage for my parts containers since I first built the Assembly Table. But like most things, other projects seemed more important at the time and it took nearly 3 years for me to get around to doing so. I store all of my parts in Stanley SortMaster Junior organizers. I like them because they have 4 latches on them and I have yet to have one open on me while carrying them. I also like that you can connect up to three of them together so if I need to carry a few of them to somewhere else in the shop or on the property I can easily carry six at a time.

IMG_4060.PNG
IMG_3775.JPG

I made two separate cabinets that slide in from either side to hold the organizers. I started off by measuring the space I had between the corner post of the table and backed out my spacing from there. One of them I built with 4 columns and 5 rows each slot sized for the Stanley Sortmaster Junior Organizer. On the other side I took a different approach. I had recently purchased a few Harbor Freight organizers. They are smaller than the Stanley, but because the bins are completely removable they have proved nice for storing small tools with accessories like a dremel and also other things that have a combination of large and small parts. I decided that I wanted to build some slots for these organizers on the other side. I also wanted to add a place to store my glue. 95% of the time when I am using glue in my shop it is at my assembly table so I thought it made sense to make a small storage are just for the glue.

At this point, the project could have been finished, however, this project marked a notable change in the Shawnee Hills Workshop. In the past I never put finish on any of my shop projects, honestly it just seemed pointless to me. As I have gotten older though, I have started seeing value in how things look. When you are in a space that you feel relaxed and comfortable in you tend to spend more time in that space and that is what is happening in my workshop as I have been making it look nicer. This table was the first piece I painted when I finished it and it has sparked a complete shop remodel!

IMG_3782.jpg

A Vacuum Cart with a Cyclone!

I have a EuroClean hepa vacuum that I had purchased when I was a general contractor that I used for lead paint removal. It is a high quality vacuum that will not put harmful dust back into the air and is really worth the price but it didn’t take long to fill up the container and dumping it always made a huge mess unless you purchased the bags it was designed to work with. I decided I wanted to use a cyclone separator to send the vast majority of the debris to a larger storage area that was easy to dump. After doing some research online I settled on the dust deputy cyclone. The cyclone is simple, all of the debris gets sucked into the cyclone. The heavier debris falls to the bottom of the cyclone, while only the lightest dust get sucked into the vacuum.

The second problem with any shopvac is dumping the debris. You always get surrounded by a plume of the exact dust you were trying to avoid. To solve this problem, I added a 4” port to the cabinet so I can plug it up to my large dust collector and suck the vacuum cart clean whenever needed.

The only issue I ran into with this build was how to adapt my shop vac hoses to the dust deputy as it did not fit any of the sizes I had. If you have a 1.5" hose you can use this adapter with a 2-1/2" or a 1-7/8" hose you can use this kit.

DIY Pocket Hole Cutter! 

Pocket_2D00_Hole-Joinery_5F00_81.jpg

I love the simplicity of pocket hole joinery. Especially when building shop furniture, cabinets, etc. The Kreg Jig has made pocket hole joinery accessible to almost everyone and is by far the most popular system out there, but there is one major thing I don’t like about them. The Kreg Jig drills the pocket at approximately 7 degrees. Subsequently it also drills the pilot hole at the same angle. This results in the screw going into the wood at an angle. This causes two potential issues. The first is when screwing things together like face frames, it requires a clamp to keep the face frames flush with one another because the slight angle of the screw tries to pull the piece that has the pocket hole in the direction of the angle. Kreg sells vice grip style clamps to solve this issue and they do decent, but it’s one more thing to have to use. The other issue that the angled screws cause is when building carcasses, when two pieces are being joined at 90° on an outside corner you have to face the pockets towards the outside. If you place them on the inside then the screws are going toward the end of the board they are going into and will be more likely to split out. This is only an issue when the side of the piece is something that will be visible when finished. You also have to worry about movement of the joint like before, but Kreg also sells a right angle clamp for this too as well as a clamp to keep the workpieces at 90°.

TSM_12__75542.1396978985.190.285.png

My first introduction to pocket hole joinery was around 2000 while working in a production cabinet shop. We used a Porter Cable 552 pocket hole cutter and it had none of the issues I mentioned above with the Kreg Jig. It drills the pilot hole 90° to the joint which solves both issues above. It also uses a down cut router bit to cut a much cleaner and faster pocket than the Kreg Drill bit. The Porter Cable is no longer sold, however there are still other manufacturers that build these. I thought about purchasing one but instead decided I would take the time to design and build my own.

I built my pocket hole machine for less than $75.00 using a cheap Harbor Freight Right Angle Drill and Trim Router and scraps from around the shop. I don’t typically use power tools from Harbor Freight, however, I honestly wasn’t sure i would be able to build a reliable machine and I didn’t want to spend a few hundred dollars on nicer power tools on a prototype. I built this all the way back in the spring of 2016 and have had no issues with it so I guess I can’t knock harbor freight too much!

Tool Wall or Tool Cabinet?

For as long as I can remember I have been obsessed with hanging tool cabinets. I think it was probably seeing the Studley tool chest that started my obsession, but I am not sure. I have a design for a hanging tool cabinet that I plan on building in the future but until that time comes I wanted something that would suffice and was quick to build. I built this in approximately 2003 and to be honest it has served me so well who knows when I will build my tool cabinet.

ldlR8Tu.jpg